Showing posts with label How To's. Show all posts

WOW: Marie Hines

I am so amazed right now & totally tearing up.  I just got a supersweet email from singer/ songwriter Marie Hines about her latest song/ video from "Better From the Living Room Sessions" and I clicked on her link to see the video.


{Marie, if you're reading this, I'll be honest, I really had no idea what to expect.}

But I was blown away.  Really blown away.  I definitely teared up.  She has such an incedibly beautiful voice, IS so incredibly beautiful, and you can just see that she is seriously passionate about what she does.  I'm instantly a new fan & wanted to share it on the blog because I thought you might enjoy her songs too:

http://www.mariehines.com/

Marie decorated her living room featured in the videos herself & styled it beautifully with a million candles.  You'll love it.

Thanks so much to Marie for sharing & you have got it GOIN on!!!


xoxo, Lauren

If you'd like help creating a home you absolutely love, contact me about our design services.

Casual-Cool "Love" Rooms

This house stopped my in my tracks when I saw it in Elle Decor.  (Back in March of '09!)  It's a 1927 redone Hollywood house that was once owned by Ingrid Bergman that now belongs to director & producer Brett Ratner. (To read the full article, go here.)

{Brett Ratner's House in Hollywood, featured in Elle Decor.  Designed by the renowned Waldo Fernandez}
The laid-back house hosts great parties & is masculine and natural.  I love its collected feel (this is almost a characteristic in my favorite spaces) and the mix of vintage & traditional pieces.  The house has such a palpable sense of place and some serious vibes.  I'd love to live somewhere like this one day.


And I must think about this window at least once a month:

{Perfection }

I'm working on a project right now & I was thrilled when my client sent over this apartment as inspiration:

{Design by Brad Ford I.D. featured in Lonny}

There's nothing better when a client pulls inspiration photos from some of your favorite magazine articles.  The ones you've poured over.

This kitchen by Peter Dunham fits right in:

{by Peter Dunham featured in House Beautiful}

I love this shot of the bowl of clementines:

{Peter Dunham}

And here's another favorite.  I want this:


It's such a practical set up with there being two tables and a little space to slide in between so no one has to scoot a mile to get to the center of the other side.  (The eating areas in my home are fairly small and I imagine I'll do something similar to this in our dining room one day to accomodate us a bit better.)

I'm so excited about the design I've been working on for this client.  It's a casual-feeling mix of modern & vintage pieces with a scultptural vibe.  The space itself is light & airy & interesting.  I can't wait to see it through!!

I'm off to work but have a great day!!


xoxo, Lauren

If you'd like help creating a home you absolutely love, contact me about our design services.

New Irregular Blog Series: "Love" Houses

If you've been following this blog for a while, you might have picked up that I'm not very good with doing regular blog series.  (And if you're new, well, I'm not good with doing regular blog series.)  I like to write about what floats my boat on any given day, so I'm better with irregular posts.  BUT in my mind I like to have some sort of organization so one of the new irregular series I'll be doing around here will be "Love" Houses.  These are the houses that have been featured in magazines or online that I just can't get over.  The articles I go back to for staring at time and time again.  The ones that I feel disappointed about when the text runs out.  The ones that get me dreaming & excited.  Some are old, some are new, but these houses are my favorite and go in the "love" pile and I thought it might be fun to share some of them on the blog.

My first favorite house/ estate is called Cherryfilelds (yes, it has a name :)  and belongs to John Dransfield and Geoffrey Ross (of Dransfield & Ross) and was featured in Elle Decor's July/ August 2010 issue.  Text is by Peter Tersian.  Photography is by Simon Upton & it was styled by Carlos Mota.

{I dream of having a massive living toom large enough for multiple interesting groupings.}

Dranfield & Ross actually traded for this house with its owner, Nancy Pine AKA "Princess" (an "outrageous" fabulous widow in her 80s.)   They foudn the house but it wasn't on the market.  They would stalk the house until they finally made an appointment to meet with Princess.  "They made a deal on the spot" and just needed to wait until Princess could find a house to move to.  They waited months while she searched and finally she asked them what type of house they had.  It was an 1806 farmhouse and they ended up swapping houses.  They think of her as their Auntie Mame and she visits when they're out, leaving notes.   My favorite part is that Princess says "The best time to visit someone is when they're not at home."   


"The building is long & rambling but it's only one room deep, so all the major rooms have light on both north and south sides."---- ummm, a-mazing. 

{You know I loooove these pools}

I love the conservatory-feel in some of the rooms:


{love their pup!}

...And find myself more & more drawn to black.

Light & airy yet dramatic at the same time:


I love that the house has a combination of airy rooms & moodier rooms. 


The kitchen is so charming.  Again, it's got that fresh-deep thing going on that I love.


I love this shot of the butler's pantry: 

{Heaven}

Everything feels so authentic & collected.  It feels carefree & relaxed yet elegant.  It's a laid-back formality that's really refreshing.  I just want to be there when Iook at the pictures.

You can view the article online at Elle Decor here and I'll be posting more "Love" houses every now & then!


I'm off for the day, but hope you had a great weekend!!  Only a couple more weeks until school's out for the summer & I can't wait!!! (my husband's a teacher)  I have the window open right now & have to be honest that I'm finding it harder & harder to buckle down in the office.  Outside's calling!!  eeeeeeeeeeek


xoxo, Lauren

If you'd like help creating a home you absolutely love, contact me about our design services.

Pure Style Project #9: How To Make Wax Drip Candle Covers for Your Chandelier

Hope you had a great weekend!  We painted the nursery, organized it (finally!) & I started hanging things on the walls.  wahooo!!  Our washing machine broke and our house got so trashed from working on the nursery and neglecting everything else,  that we decided to head over to my parents' house and do laundry & order pizza & watch movies Saturday night.  They'd gone out for the night so we got to relax in their newly finished basement (redone after the flood.) (For those of you who haven't been reading this blog since the beginning, Dave & I had moved into my parents' last year to save up for this house.  It was one of the best things we ever did, although at the time it seemed like an eternity.)  It was cool to be back in our old "home" (the basement) Saturday night and remember all of our saving & dreaming & planning for a new house and to realize that we were there.   

Also, I've decided that because so many of our projects are decorating-related and not necessarily organization projects, I'll include both.  (BecausetTicking stuff off of my "to do" list gets me more organized even if it is purely decor-related.)

For this week's project I wanted to share with you the wax drip candle covers we made.  The stark white candle covers always bothered me on our old chandelier.  (We'd had to rewire it and replace the old damaged candle covers that were oroginal to it.)  I wanted pretty wax drip candle covers. 


So we made glue drips down the sides of the 30 cent plastic covers with Elmer's Glue.  I let a layer of drips dry before starting another one.  Here's the first layer (below).  Just start at the top with a glob of glue and let it drip down.  (As you can see from the pics it was a learning process.)  And use something better than a paper towel as the surface...  it sticks to the candles.  ;)


Once they'd dried and I had enough layers, I painted them with a cream paint we had lying around:


Here's a close-up:


I'm really way more into the orangey-aged color of the one wax drip candle cover below on the left (It adds so much to a chandelier) but I didn't have the right paint lying around. 


 So here they are for now & when I get the chance, I'll be recoating in a more orangey paint & antiquing:


But so much better for now.  (At least I don't cringe when people look up & examine my poor chandy or I put pics up on the blog.)  So if you have any chandeliers that are in need of new wax drips, please join in and link up!!  

xoxo,
lauren

ps-  This project's at your own risk.  I didn't use heat resistant paint, which I'm sure would be the smartest thing to do...  We checked our covers (prior to painting) and they don't get warm so we went for it, but that's up to you.  :)

On a Crafty Scale, I'm probably above-average for normal people but below-average or average for crafty bloggers/ blog readers/ DIYers.  I get very impatient & sloppy and like quick & easy projects.  This was sooo easy.   

*update -  also I didn't come up with this myself-- I think I must've read it in a magazine a few years ago**  :)

How To Handle Gifts You Don't Like


Sometimes I take risks when giving gifts. These "risks" are either perfect or awful. For example, my husband is an awesome ice hockey player & loves skating & rollerblading. We were at the airport a few years back & we saw kids flying around on heelies & he said "I want those! How fun would the grocery store be with those?" I thought, "That would be amazing!" So a couple of months later I surprised him with an adult pair for his birthday. hahahahhaha i can't even not laugh when thinking about how bad it was.


He looked at me like "What the-?" before proceeding to try them on & tell me he'd been kidding about heelies. And then he attempted to "skate" in them. In the kitchen. And he fell. HARD. a couple of times. It was bad. I mean hysterical, but bad. I returned them the next day.


You win some, you lose some. I tried. It happens to the best of us.


SO, this brings me to: what do you do when you GET a gift you don't like? A reader emailed me with this question specifially asking about home decor items.


When I get a decorative accessory of some sort that I really don't like, I thank the person for their gift & am very appreciative of it. I then take it home & hide it somewhere in my house for a while. What happens when they come over the next time? Do I take it out & display it so they think I love it? Nope. I'm not that sweet. I eventually exchange or donate it.

This may sound harsh, but I'm also not flying a sign that asks for more decorative gifts either. As tempting as it is to display items that you hate when people come over, I don't think it's the best idea because then they think you love what they got you and they WILL BUY YOU MORE.


I remember hearing a story about a bride at her bridal shower who received something she couldn't stand. I think it was something like a fruit salt shaker set?? And she said something like, "I love it!!!" and went on about how fake food was so cute. And from that point on, people thought she was into porcelain food & started giving it to her at every occasion. Soon she had a whole collection displayed in her home out of guilt & I don't know how many years it went on like this until she had to tell the truth. Let that be a lesson. WOW

I'm always genuinely thankful & appreciative when I receive something, because the person giving it to me put time & energy & money into their gift, but I don't think that means I need to hang it in my house. I appreciate the gift & the thought, but I am way too picky about my home to display things I don't love. I would never want to hurt anyone's feelings but I don't think it's something that's very fair to be hurt about either.


As a gift-giver, I want the person I give a gift to to really like what I've given them. And if they don't, I want them to exchange it and/ or give it away. I would feel terrible if they displayed something in their home that they didn't like just to please me. Because that's not what the gift-giving is about: It's about pleasing the receiver, not about you as the giver. (Can you imagine poor Dave trying to learn to use his heelies & wearing them all the time just to please me & make me feel like he loved my gift??) It's just not a fair thing to expect of gift-receivers and if a person expects to see their gifts displayed around your house when they come over then I would say they're giving you the gifts for themselves as well as for you. (Of course it feels good to give a gift but that isn't why we give.)

You wouldn't wear something that didn't fit you right just because it was a gift, would you?
Well, I say the same goes for something in your home. If it doesn't "fit right" you shouldn't feel guilty about not displaying it.


And, now I have to admit that it's been a VERY long time since I've received a gift I didn't like. It seems my family & friends have caught on to how defined my tastes are and may even slightly FEAR buying me decorative accessories. (eeek!) But seriously, in the past few years, the people around me have learned how picky I am about something that's going to go on my wall or a table top or a shelf. I've been up front in conversations explaining how I am & I think they've also worked really hard to find things they know I'd love. (For example, my aunt just gave us this HUGE awesome scary guy doorknocker & I LOVE it!!)

My mother-in-law is awesome about decorative accessory-type gifts. She's a realtor & is always coming across things at house sales & buying them because they're great deals. If she thinks I might want something, she shows it to me & asks if I want it. There is no pressure here & love this! And, since she knows I'm comfortable telling her that I don't want something, if I do take something from her, then she knows I really love it. It's a win-win for both of us.


**And a quick note to any friends or family who might find a gift of theirs stashed in a closet somewhere in my house: it doesn't mean I don't love it, remember how I switch out my things all the time? It's probably just off-season ;)**


So, my advice is to be vocal about your tastes so you can help others avoid giving you something you won't like. (This may sound selfish but I honestly think people are happier when you love their gifts... and it's so much less awkward when opening them! ;) And when you get something you really love, don't be shy about telling the giver how great it is & why you like it so much. And, if you do get something you don't like, of course be gracious & appreciative of the thought but don't fall into the trap of displaying things you don't like... or you will get more.
xoxo,


lauren

ps- to any friends or family members: If you checked the closets & the storage room & your gift is still nowhere to be found.... uhhhhhh ;) ;) ;) love yas!

How To Arrange Your Accessories @ Pear Tree Cottage!


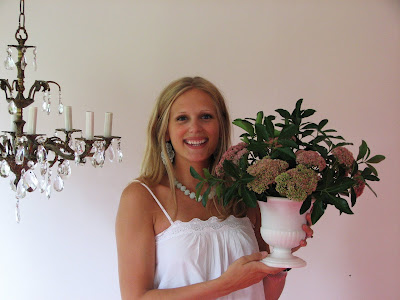
I had such a great time doing the Pear Tree Cottage Design Seminar this weekend! Above is me with an arrangement I did for one of the demonstrations using sedum & some unknown bush cutting from my yard in a vintage milk glass urn. Here are the lovely ladies of Pear Tree Cottage:


It started off perfectly with some champagne and boy did I wish I could have a glass! (I was definitely a bit nervous before it started but everyone was so sweet & there were lots of smiling faces as I began.) One reader even came with a broken foot!!!! (see below) Thank you so much for making it!!!! :)

I really can't tell you how much it meant to see so many of you who show up & it was SO GREAT to actually get to meet you in person!!! I really felt like it was an audience full of friends... (I wish you all could have been there, so I'll try & recreate it ;)


Below on the left is Michele from My Notting Hill and I was so happy to finally meet her too!! Michele was one of the first people to take an interest in my blog & included me in her "DC Designer Series" and I was so excited when I read her post...
Ok, some of you asked me to videotape it, but I was nervous enough and also am technologically-challenged & unsure of how to get a video online (maybe future??) so I'm going to give you a serious breakdown of what I said & how it went. (I apologize to anyone there because this really is justy a play-by-play and might bore you to hear it a second time!!) I went around the store and arranged accessories on an antique vanity used as a console table, a bookshelf and finally a mantle. I started out telling a story about how my friends & family used to come to my house & every time it looked different. It was rearranged & the living room that used to be blues & greens was now beiges & golds. They'd always come in, say 'hi' to me and then start looking around to see what was new. They'd say things like, "You have WAY too much time on your hands," and "How can you afford to redecorate all the time?"


And the truth was, I wasn't really redecorating all the time... I was simply reaccessorizing. (Although I probably do have too much time on my hands! ;) I wasn't buying a tons of new things - of course I shopped a little- but I was rearranging my rooms, moving artwork, pillows & other accessories from room to room. The furniture was still the same, the paint was still the same, they just didn't realize it. This is the power that accessories have to transform a space.
When accessories are done well, a room can be thoughtful, personal & beautiful, but if done poorly, it can feel cluttered, oudated or contrived. The talk I gave was all about breaking down the process of arranging accessories step-by-step so that people could go home & try to get their accessories right in their own homes.


I started out with a quick explanation of visual weight, which is how much space an object takes up, not how heavy it is or how much it actually weighs. For example, a rock and a bouncy ball of the same size & shape are totally different weights, but they visually, they weigh about the same, meaning they have the same visual weight. This comes into play when we’re trying to create balance... Obviously two identical objects placed on a table can create a balanced arrangement, but you can also create a balanced arrangement if you use two objects of equal visual weight. (This is called “informal balance” vs “formal balance.”)
Then I moved around the shop and went to a vanity that was empty & began arranging it as an entryway console table. The look IO was going for was a mix of antique & modern so I chose the antique vanity & paired it with the modern lamps... I layered it with these amazing silver antler candle holders and piled up a bunch of my own decorating magazines for some height & because I wanted to use "real" objects people have lying around their home. I tucked in a really interesting magnifying glass & letter opener (bottom left) for some a nice, low horizontal addition to the arrangament and I used a vintage drink mixer of ours with a branch from a bush outside my house for some freshness.
Finally, I loaded a pretty little tray atop the magazines with "not-so-pretty" things like my keys & cell phone & sunglasses so the audience could see how when you put everyday, functional objects with beautiful ones, the arrangement feels "real" and beautiful & the everday things look great. :

Here's a good step-by-step breakdown...
How to Arrange Tabletops:

1. Create a focal point- (The mirror)
2. Create balance with a pair of objects - (the lamps)
3. Add a “spontaneous” item to overlap the focal point a bit to one side - (the candle holders)
4. Add layers of interest for a personal feeling, using items of varying height & sizes (magazines)
5. Include a tray or low horizontal item such as a book or plate - (the magnifying glass/ opener)
6. Finish with fresh flowers or greenery (my branch in the drink mixer)
...... And then I added a tray of "stuff" for some reality ;)


Next I arranged an empty bookshelf. (Above, Baby #2 is almost 6 months along & you can really tell from the side!!)

I explained how starting out with your favorite objects in the most prominent spaces is a good way to start. I brought in a bunch of paperbacks & showed how if you flip them around so the page sides are showing, you can really get a beatiful look & pair them with other pretty books.

I set up the books first and then filled in with larger objects. (Small objects don't usually work very well in b ookshelves because they end up looking cluttered & knick-knacky)... I used some books on the horizontal and others vertically to add interest. I layered a print in the background for interest & filled in all the holes with pretty things. (Below is the arrangment missing some things, (bottom right) because they SOLD before I could get a picture afterwards!! haha)

And here's another breakdown...
How to Arrange Bookshelves:
1. Decide how you want your shelves to feel: formal, perfectly placed or casual & “undesigned.”
2. Start at the most prominent spot and work your way up and down or out, keeping things balanced as you go
3. Take a digital photo and review the finished shelf, then go back and fix any trouble areas
4. Switch it up & have fun whenever the mood strikes you!!! This is what keeps our homes fresh & beautiful.

And finally, I showed how to arrange a mantle. I started out with an empty one (above)-- do you recognize it? It's ours from our house! (Dave was installing the hardwood floors & it was off the wall so we brought it in for the demonstration) I first showed how just adding a focal point (the mirror- oh the silverleaf driftwood mirror! WOW) and 2 objects for balance (the sconces) and a beautiful centerpiece, you could be finished and have a beautiful, simple arrangement (try to ignore the cords).. it would be created using "formal" balance because everything used has an identical pair except for the central items.

Then I created a layered, collected look and explained how by adding in "spontaneous" objects, you could get a more casual, relaxewd, "off" arrangement. (I used a mix of metal, wood, green & white & made sure it was carried throughout the display.) Here's the finished mantle, below:

Here's the breakdown again:
How to Arrange a Mantel

1. Create a focal point (mirror)
2. Create balance with objects (sconces)
3. Decide how much you want going on… if more- add layers of interest (print, wooden mushrooms, white urn)and a tray or low horizontal item (little row of white -figs- (I think??)
4. Finish with fresh flowers or greenery (the urn with flowers)

It was such a great time & I had so much fun meeting everyone!! I would love to think of a way to meet more readers, so I'll be brainstorming. Here's Michele & I:

And here I am with the lovely (so sweet & happy) Frances, owner of The Pear Tree Cottage:

Thank you SO much to Frances & everyone who attended. I had the best time and you all made me feel so comfortable!!!!

xoxo,

lauren

ps- I have some more details on ideas for accessory display so I'll be posting them later this week.