
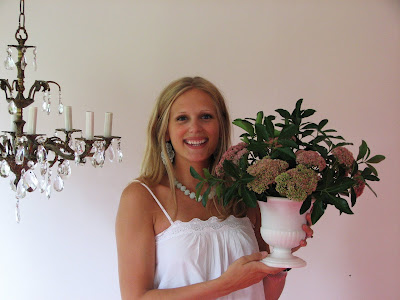
I had such a great time doing the Pear Tree Cottage Design Seminar this weekend! Above is me with an arrangement I did for one of the demonstrations using sedum & some unknown bush cutting from my yard in a vintage milk glass urn. Here are the lovely ladies of Pear Tree Cottage:

It started off perfectly with some champagne and boy did I wish I could have a glass! (I was definitely a bit nervous before it started but everyone was so sweet & there were lots of smiling faces as I began.) One reader even came with a broken foot!!!! (see below) Thank you so much for making it!!!! :)
 I really can't tell you how much it meant to see so many of you who show up & it was SO GREAT to actually get to meet you in person!!! I really felt like it was an audience full of friends... (I wish you all could have been there, so I'll try & recreate it ;)
 Ok, some of you asked me to videotape it, but I was nervous enough and also am technologically-challenged & unsure of how to get a video online (maybe future??) so I'm going to give you a serious breakdown of what I said & how it went. (I apologize to anyone there because this really is justy a play-by-play and might bore you to hear it a second time!!) I went around the store and arranged accessories on an antique vanity used as a console table, a bookshelf and finally a mantle. I started out telling a story about how my friends & family used to come to my house & every time it looked different. It was rearranged & the living room that used to be blues & greens was now beiges & golds. They'd always come in, say 'hi' to me and then start looking around to see what was new. They'd say things like, "You have WAY too much time on your hands," and "How can you afford to redecorate all the time?"


Here's a good step-by-step breakdown...
How to Arrange Tabletops:
1. Create a focal point- (The mirror)
2. Create balance with a pair of objects - (the lamps)
3. Add a “spontaneous” item to overlap the focal point a bit to one side - (the candle holders)
4. Add layers of interest for a personal feeling, using items of varying height & sizes (magazines)
5. Include a tray or low horizontal item such as a book or plate - (the magnifying glass/ opener)
6. Finish with fresh flowers or greenery (my branch in the drink mixer)
...... And then I added a tray of "stuff" for some reality ;)

Next I arranged an empty bookshelf. (Above, Baby #2 is almost 6 months along & you can really tell from the side!!)

I explained how starting out with your favorite objects in the most prominent spaces is a good way to start. I brought in a bunch of paperbacks & showed how if you flip them around so the page sides are showing, you can really get a beatiful look & pair them with other pretty books.

I set up the books first and then filled in with larger objects. (Small objects don't usually work very well in b ookshelves because they end up looking cluttered & knick-knacky)... I used some books on the horizontal and others vertically to add interest. I layered a print in the background for interest & filled in all the holes with pretty things. (Below is the arrangment missing some things, (bottom right) because they SOLD before I could get a picture afterwards!! haha)

And here's another breakdown...
How to Arrange Bookshelves:
1. Decide how you want your shelves to feel: formal, perfectly placed or casual & “undesigned.”
2. Start at the most prominent spot and work your way up and down or out, keeping things balanced as you go
3. Take a digital photo and review the finished shelf, then go back and fix any trouble areas
4. Switch it up & have fun whenever the mood strikes you!!! This is what keeps our homes fresh & beautiful. And finally, I showed how to arrange a mantle. I started out with an empty one (above)-- do you recognize it? It's ours from our house! (Dave was installing the hardwood floors & it was off the wall so we brought it in for the demonstration) I first showed how just adding a focal point (the mirror- oh the silverleaf driftwood mirror! WOW) and 2 objects for balance (the sconces) and a beautiful centerpiece, you could be finished and have a beautiful, simple arrangement (try to ignore the cords).. it would be created using "formal" balance because everything used has an identical pair except for the central items.

Then I created a layered, collected look and explained how by adding in "spontaneous" objects, you could get a more casual, relaxewd, "off" arrangement. (I used a mix of metal, wood, green & white & made sure it was carried throughout the display.) Here's the finished mantle, below:

Here's the breakdown again:
How to Arrange a Mantel
1. Create a focal point (mirror)
2. Create balance with objects (sconces)
3. Decide how much you want going on… if more- add layers of interest (print, wooden mushrooms, white urn)and a tray or low horizontal item (little row of white -figs- (I think??)
4. Finish with fresh flowers or greenery (the urn with flowers)
It was such a great time & I had so much fun meeting everyone!! I would love to think of a way to meet more readers, so I'll be brainstorming. Here's Michele & I:

And here I am with the lovely (so sweet & happy) Frances, owner of The Pear Tree Cottage:
 Thank you SO much to Frances & everyone who attended. I had the best time and you all made me feel so comfortable!!!!
xoxo,
lauren
ps- I have some more details on ideas for accessory display so I'll be posting them later this week.
 As a decorator & a textile designer, this is my place to muse... perfection doesn't interest me; Reality and charm do. Fresh floppy flowers from the garden over long-stemmed roses any day, I love it when things are slightly off and tell a story.
38 comments:
Thank you for a terrific lesson on arranging accessories. I loved your story about friends thinking you decorated. My best friend always says she loves coming to my house because it's a different show every time.
BTW, you carry your baby so beautifully.
I bet that was a FUN evening!!!
suzanne
Thank you for some really good tips. You look beautiful with that lovely tummy!
Carolyn
Lauren - It was a terrific session - you did a great job! The concept of formal and informal symmetry was really helpful. Besides great ideas you are a natural, relaxed & fun speaker!
Oh wow what fun. So sad I wasn't able to attend! You look amazing!!!!! So happy to see your belly.
Love all the tips you did and that store looks like a lot of fun. I already spotted tons of things I wanted.
Miss you!!!!
xoxo,
Camila
Great lesson! Thank you so much!!! :))
what fun and great work. you look fabulous too.
This is a fabulous recap for me. Thank you for posting! It looks like you had a great turn out too.
Looks like such a fun time! Thanks for the tips! And...aren't you just so beautiful!
Thank you SO much for posting all of these steps!! Accessorizing is the hardest thing for me so this is the BIGGEST help! Love your blog!
You are really the cutest thing ever!!!! I wish I was there!
Looks like you had an amazing time! And great ideas!! :) So is your belly growing faster this time? Mine sure is! Only 11 weeks to go now!! :D :D
Looks like it was so much fun!! Thanks for all the great tips/pictures here too. I learned a lot!!
looks great! I bet you had a great time!
Smiles!
Michelle
Great tutorials! Thanks for the play-by-play for those of us who couldn't make it :).
BTW, I love your top. So cute!
just found your blog. you're so cute!
okay, i gotta a question. do you have any ideas for fireplace mantles that have a flat screen above.
i never know what to put on there that isn't the norm but still looks good.
during the holidays i have it covered, but during the other times i hate it!!!
cheers,
b.
Wonderful post ~~
and lovely blog!
xo Laura
You are a natural with accessories! (as well as a glowing mum)
pve
Umm, first of all you look just BEAUTIFUL! That shirt, the necklace, the earrings you look great!!
Second, I am so jealous of everyone that got to go, I wish I lived closer for these kinds of events! Looks like a blast was had by all!!
You always do the best job of explaining things! And on top of that you look fabulous, my dear!
Great tips! Thanks for sharing. I need to redo my dining room buffet using those.
And you are looking great, preggo momma!!! :-)
you really are a natural -- I'm hanging on your every word, and even linked to it on my blog :)
you look darling, too! pregnancy agrees with you :)
Hi Lauren,
I loved everything you did. And your tutorial. I going to go outside right now and clip a branch and install it in my bathroom in one of my cute vases. So simple.
Congrats on your talk, wish I could have been there!
xoxo
Maria
So bummed I don't live in DC! Looks like you did a great job!
xoxo
Alicia
L, I am looking at my 10 min vignette while reading your tips... I think I had it all, but did not know the rules...hahaha It was fun. Go look at my post and let me know what you think. Plus, you are the cutest little thing! I remember when I was young and cute...Enjoy it!!
Absolutely gorgeous!!! And the accessories looked pretty too. ;-)
You are glowing, my friend. What a great post!
P.S. Love that shirt and necklace combo!
You and your belly look AMAZING! So happy for you Lauren.
Love this post. It's been circulating around the blogosphere. I so appreciate you taking something that feels complex and making it understandable and useful for us non-design folks. You are one of my design gurus.
Great job! And look how much fun you had!
Oh what a great and interesting post...
You obviously had so much fun.
And great job in using accessories to make old spaces look and feel new.
I just left you a really long comment but I think you were deleting the post..... I really want to share what I was saying because I think it will be helpful...
First, I think you did an excellent job and you ought to be proud of how you handled the situation. I think you showed the utmost in class and sensitivity. And the design was beautiful.
Secondly, I think that you have two things to consider: One you ought to feel really good about every design you do and 2) you need to make the client happy. If both of those cannot be accomplished in one design...it is not the best match.
I used to be a marriage therapist and once in a while there would be a a couple I could not work with. For example, I did not feel specialized enough to counsel a couple with physical violence....so I always had cards on hand for counselors who did. I would network with other designers in your areas and collect their cards and study their personal style so that you can refer clients as necessary. it will be a win-win, trust me.
And I would bow out of any further work in this case. You can delete this if you wish but I wanted to share it with you and could not find your e-mail:)
Kim
P.S. I love this workshop lesson and will utilize it right away. I have one antique cabinet that has nothing on it right now and I just need to accessorize it:)
You look adorable! What a great way to meet readers and use your fabulous talent!!
Does Pear tree cottage sell on-line..I am interested in a few pieces:)
Great tips! thanks for sharing!
So happy to have found your blog. I live very close in Arlington! I'll have to stop by Pear Tree Cottage sometime soon! Great accessorizing tips! :)
I am thrilled to have found your blog! I am about to open my own shop, and I feel certain that I can take away a LOT of valuable information from you.
Consider me a follower and a fan!
~ Anne
You are the cutest pregnant woman! I think it is great you are having your kids while in your 20s; I had 2 of my 3 while still in my 20s, and now it is wonderful still being relatively young, and yet not having babies. My oldest did a class project where they had to graph the ages of the parents in the class, and I was the youngest - I was really happy about this, for some strange reason! The oldest parent was 23 years older than me!!!!!
you look darling! love the bookcase and that alligator head is too fun!
Post a Comment