
 Images with flash end up being dark & cold & cheap-looking. (above & below)
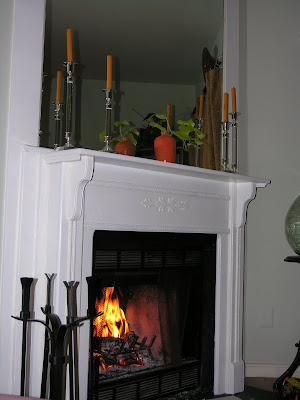 Now, check out the "after" (below). It's light & airy and much better:
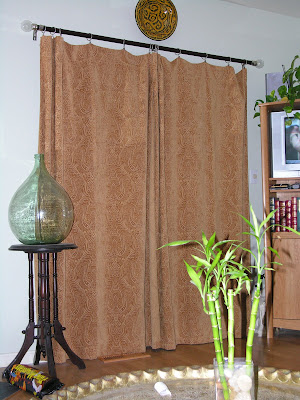
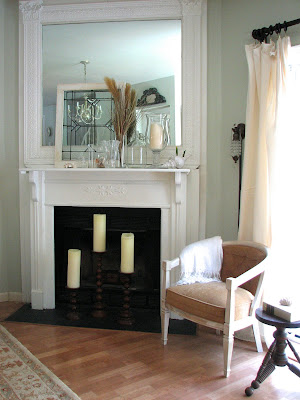.jpg) 2) Shoot during the day when the lighting is good. (Unless you're specifically after nighttime shots like a Christmas tree at night or candles or something special like a city view.) Here is our living room when we first moved in. (With all of my lovely decor from my old apartment... eeeeeek) I didn't use flash on it even though it was taken at night: (which is good)
2) Shoot during the day when the lighting is good. (Unless you're specifically after nighttime shots like a Christmas tree at night or candles or something special like a city view.) Here is our living room when we first moved in. (With all of my lovely decor from my old apartment... eeeeeek) I didn't use flash on it even though it was taken at night: (which is good) But check out the difference in the same room during the day: (no flash of course)

How much prettier do these (below) look? No clutter, no flash... HUGE difference:

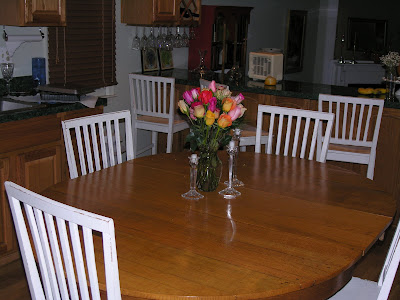
 Styling for the kitchen: Sometimes people actually go too sterile when photographing kitchens. But, remember you can ditch items like your toaster (if it's not cute & takes up too much space), sponges, pot scrubbers, pens & pencils, etc. Consider having a pretty soap dish or dispenser, nice towels, good-looking cooking utensil holder, a bowl of fruit and/ or vase of flowers.
The pictures above & below are from when we sold our house so actually a few things are missing because staging is different from decorating (like the pretty towels & a few things that might warm it up) but we did set up a couple of bottes of Aquafina on the bar, which I always think looks nice. (I love Aquafina bottles & totally refill them with fresh water & stick them back in the fridge!!)

 Show personal, but not-too-personal-items that make the space look lived in: NOT the box of tissues but maybe a cool glass of water in a vintage glass or a pair of glasses on a stack of pretty books..
For living rooms, a lot of the same things apply. Use pretty pillows and interesting accessories. Get rid of any clutter that isn't attractive. Always add fresh flowers or greenery if you have time. You'd be surprised what a huge difference adding flowers/ greenery into the room does. Again, the goal is to make the space look "lived-in" but not cluttered.
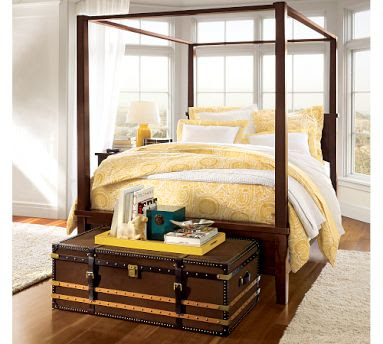
 Pottery Barn is awesome at styling in my opinion. I might not always be in love with what they're selling but I'm always so impressed with their styling. (above) For dining rooms, make sure there's something beautiful on the table. It doesn't necessarily have to be a set table (which does look gorgeous) but it could be something simple like a pair of lanterns or dinnerware stacked up as if it's about to be set with a little vase of fresh flowers.

Take advantage of tabletops & shelves. Every surface is a change to create something beautiful. It's important to train your eye. Scour catalogs & design magazines & notice all the details that are present & missing. You'll be surprised by how much you can learn & by how good you'll get.
4) Use a tripod or hard surface to set the camera on. I'm really guilty of not following this rule and it shows. This is huge because if you're not using flash, it's really easy for the photo to blur and any movement at all messes the photo up. (Virtually none of the photos I take myself are clear enough, probably because if this!! ok, I know what I need to go buy!!)
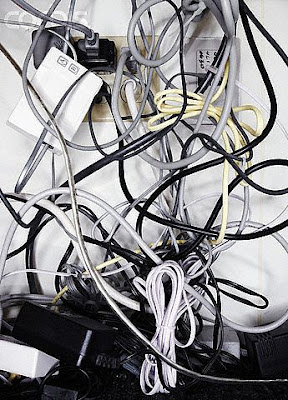
5) Leave out any unattractive features in the room from the shot... Depending upon the look/ mood you're going for, this could be anything from the TV, to speakers, to the chair that you just haven't had the time/ money to reupholster yet.

6) Shoot from lots of different angles & take TONS of pics. I'm not a professional photographer so I don't know which angle a shot will look best from so I take them all. This way, I get tons of photos of one room & I have my pick of which shot works best. I'm often surprised that the one I thought would work the best, doesn't. Get low, get high, go straight on... try it all. (You'll eventually get the hang of what usually works best & won't have to always take so many shots but it's good to start out this way to find out what you like. )
7) Figure out the style of photography you like & try to emulate it. There is a HUGE difference between Architectural Digest & Domino. I made the (HUGE!!!) mistake of spending $$$$s on a photographer who did work for Architectural Digest to shoot for my portfolio. His work was amazing, but totally not my style. The photos ended up looking static & serious to me, which was not how I wanted my work coming across at all. The angles were all straight on & I couldn't feel any movement in the room. I was able to use a few shots that I loved, but overall for the amount of money I spent, I was really disappointed. (They're all on my website now & it drives me CRAZY!!! arg!!) But the point is, it was my fault. I didn't have enough knowledge of the style of photography I wanted. If you can figure out what you like, you can immitate it. (country living image below)

So, there you have some info on how to get better interior shots. I know I didn't address any technical issues & that would be because I'm still clueless in that arena!!! (I have yet to read my camera's manual so that might help a bit!) Hope everyone had a great weekend!!!
xoxo,
lauren
 As a decorator & a textile designer, this is my place to muse... perfection doesn't interest me; Reality and charm do. Fresh floppy flowers from the garden over long-stemmed roses any day, I love it when things are slightly off and tell a story.
24 comments:
That was a great tutorial.Thank you for sharing all your tips!
Carolyn
This was great!! I always have such trouble shooting pictures, they are just awful!
I did try a few without the flash after you suggested it, thank you! Much better!
Great suggestion to take loads of pictures at once too! After I upload to the computer and see nothing I like I have to get up and re-take all the time! Better safe than sorry, and have precious time wasted!
Thank you!
Great points Lauren...and some great example images, too!
Thanks!
These were fabulous tips! Thanks for posting them.
Love this post- there are some really obvious things but I somehow I always forget, so thank you for the reminder.
I'm still working on my BF to get me a new camera- when I finally do get it, I will need all the advice I can get :)
Great tips and in my case...get a great camera! I need one bad...
Great tips. I so agree with the whole flash deal. It took me a little bit to figure it out, but I noticed the same thing as well and it makes a world of difference!
Thanks for the tips! I have always taken pictures with both the flash on and without and you're right that no matter what it always looks better without it.
These are really great tips, Lauren. Thank yoU!
Fabulous post, and pictures, once again! Thanks so much for the great read.
Your right on... especially with the NO flash in the house! Thanks for sharing, xoxo~Kathy~ Sweet Up-North Mornings...
This is a great lesson. I still struggle to get good room shots. I cringe thinking about all the rooms I have done that I don't want to put on my website because they just don't look good. I will be sure to try these tricks!
Lauren,
That was an amazing post! Love your step by step photos. I actually drove down to the Seattle Design Centre last year (from Vancouver) and did a "how to do your own photography course" from a designer in New York and the tip he gave (that I use all the time) was not to include the corner of the wall of a room in the shot. (but use it as a guide to make sure your shot is straight). Another way to describe this would be, don't take a picture of a steam shower from the outside showing the glass but take it from the inside where you can see the lovely faucets you chose and the tile.
Anyways, excellent post, I loved it!! We all need help with our photography because when you are a blogger you turn into the paparazzi!
Great insights! I'm all about turning off the flash. Now I just need to pull out the tripod and give it a go.
Very helpful post. I learned a lot here. I love your style.
Love your tips on the photography!!! x
Thanks for these great tips. I'm new to blogging and new to my fancy camera so I can use all the help I can get. I love your home, by the way. Gorgeous pictures!
Great tips, Lauren! Thanks!
I'm sill not very comfortable with my camera but I need to get there fast if I'm going to post my own work on my blog. The best tip, I think, is to simply take a BILLION photos and hope that maybe two will be good! Sometimes, I get too impatient and don't take enough... but I'll take lots more from now on!
This is a great post :)
Another tip - it's great to try and take a shot from a higher angle than eye level. This makes the room look bigger. You can do this by standing on a chair. And, leave lights on, even when you're shooting in the day light. It adds warmth :)
fantastic post! Thank you so much!
Thanks for the great tips. Thanks to DH we have a terrific camera, but my blog photos always look meh compared to everyone elses. Your advice is so simple, but wow what a difference.
Also, LOVE your house. Can you come here and make things look that good? LOL!
Thanks for the tips! I just bought a canon rebel and have no idea how to use it to photograph my shop. I suppose reading the manual would be a good idea :) BTW your house is great, now going to your website to see the photos you hate...
Great tips! Thank you so much. :)
Hi Lauren...
What great tips....I didn't know about the "no flash" rule until very recently....gosh, I sure wish I'd known that little tip. Lots of my pictures are pretty crummy!
Blessings,
Spencer
Post a Comment